You’ve probably dreamt of aging your own whiskey, right? There’s something undeniably cool about the idea of crafting your own bespoke spirits. It sounds complicated, but honestly, making your own whiskey barrel is surprisingly doable and won’t break the bank. You just need a few basic tools and the right kind of wood. A little effort now, and you’ll have your own custom barrel ready to age and flavor your favorite liquor.
Choosing the Right Wood
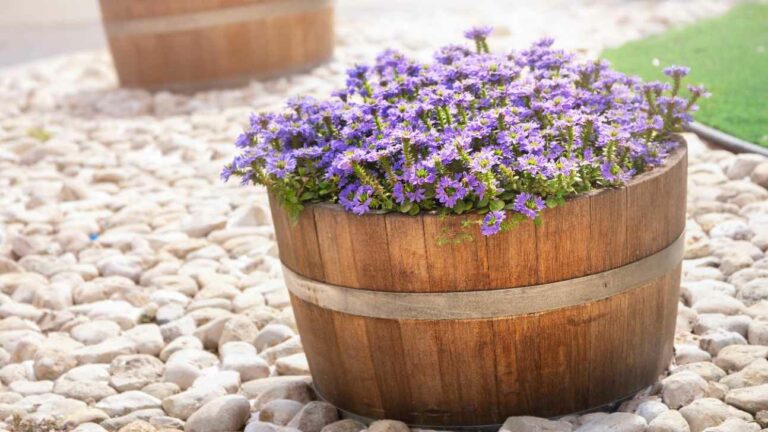
The wood you choose is super important. Oak is the classic choice because it gives the whiskey a lovely vanilla and caramel flavor. American white oak and European oak (like French oak) are the popular picks.
American white oak is a good all-rounder. It’s porous, so it lets the whiskey breathe, mellowing out the flavor. It also has these compounds called lactones that add a coconut aroma. French oak, on the other hand, has more tannins, which makes for a spicier, fruitier whiskey. Whatever you choose, make sure the wood is kiln-dried and hasn’t been treated with any chemicals – you don’t want those leaching into your whiskey.
For the barrel staves (those are the individual pieces of wood that make up the barrel), you’ll need oak boards that are cut and shaped. The staves should be air-dried for at least six months to really open up the wood pores. When you’re putting the barrel together, use food-grade wood glue and stainless steel hoops to hold everything in place.
With the right wood and a little know-how, you’ll have a handcrafted barrel ready to age your whiskey and give it a unique, personalized flavor. Start with a smaller barrel, like a 2- to 5-gallon one, for home use. And remember, patience is key! It can take years for a whiskey to age properly. But trust me, when you finally open that first bottle, it’ll be worth every second.
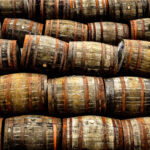
Finding Staves and Barrel Rings
Finding the right staves and barrel rings is a big part of this whole process.
You want white oak staves that have been properly cured and planed to the right thickness. White oak is ideal for aging whiskey because it’s watertight and it adds great flavor. Look for staves that are already cut to the right size for your barrel – usually around 24 to 30 inches high and about ¾ of an inch thick.
For the barrel rings (the top and bottom pieces), you’ll need two circular pieces of white oak. They should be a little bigger in diameter than your staves when they’re arranged in a circle. These rings are what hold the whole barrel together, so they need to fit perfectly.
Once you’ve got your staves and rings, you’re ready to start shaping and charring. But remember, the quality of your materials makes a big difference in the final product. So, take your time and find a reputable wood supplier who specializes in barrels. Your whiskey will thank you.
Putting the Barrel Together
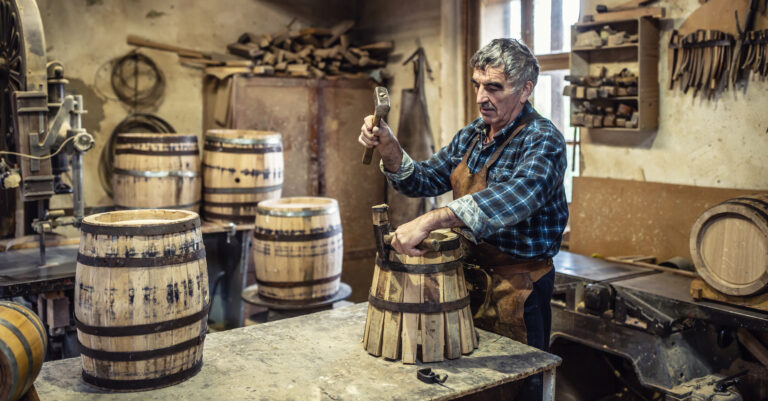
The barrel body is made up of staves – those narrow, bent pieces of wood that form the sides. You’ll need about 30 to 36 staves for a typical whiskey barrel.
- Arrange the staves: Lay the staves out in a circle on your work surface, with the inside of the wood facing up. Make sure the groove (or channel) in each stave lines up with the groove in the stave next to it. They should form a complete circle.
- Add the hoops: Slide the metal hoops over the top of the staves. Use a hammer to gently tap the hoops down towards the bottom of the barrel. This pulls the staves together tightly. Add more hoops, spacing them about 6 to 8 inches apart. Leave the top hoop loose for now.
- Check for leaks: Turn the barrel over so the inside is facing down. Pour some water into the barrel to see if any leaks between the staves. Tighten the hoops as needed. Turn the barrel right-side up again and pour out the water.
- Attach the head: Center the barrel head (the circular piece of wood that closes off the barrel) over the open end. Gently tap it into place with a mallet. Put the final metal hoop over the barrel head to hold everything securely.
Your barrel is now assembled and ready to age some whiskey! Check it regularly for leaks in the first few weeks before you fill it with spirits. You might need to tighten the hoops a bit to prevent any leaks.
Toasting the Inside
Now for the toasting! This is a crucial step. It helps the wood swell and seal the barrel, preventing leaks. It also caramelizes the wood sugars, which adds flavor to the whiskey.
- Light a fire: Build a small fire inside the barrel using kindling and hot coals. Keep the fire going for about 30-45 minutes, until the inside of the barrel is toasted and charred the way you like it. The longer you toast, the darker the char, and the smokier the flavor will be.
- Check the toast: Once the fire dies down, take a look at the inside of the barrel. You’re aiming for a light to medium brown color. If it’s too light, build another small fire. If it’s too dark, you’ve over-toasted it, and you might need to start over with a new barrel.
- Put out the fire: Use a fire extinguisher to completely put out the coals and any remaining fire. Make sure there are no hot spots or embers left.
- Clean the barrel: Use a garden hose to rinse out any ash and debris from inside the barrel. Let the barrel air dry completely for at least 2-3 days.
Your barrel is now toasted and ready for whiskey! The toasting not only seals the wood but also adds a lovely caramel and oak flavor to your whiskey as it ages. With a little care, your whiskey will be infused with rich notes of vanilla, spice, and smoke.
Sealing and Finishing the Outside
Once your barrel is built, you’ll want to seal and finish the outside to protect the wood and make it look nice.
- Seal the wood: Apply 2-3 coats of food-grade sealant, like beeswax or mineral oil, to the outside of the barrel. Use a paintbrush to cover the staves, hoops, and heads completely. Let each coat dry before adding the next. The sealant will help waterproof the wood and prevent it from cracking.
- Add the hoops: Put the galvanized metal hoops over the top and bottom of the barrel and hammer them into place. Start with the bottom hoop and work your way up. The hoops will keep the barrel’s shape.
- Attach the spigot: Once the hoops are on, install the spigot in one of the lower staves, near the bottom hoop. Drill a pilot hole first, then screw the spigot in tightly. The spigot is how you’ll pour your whiskey.
- Add handles (optional): If you want to be able to move the barrel easily, put a pair of sturdy handles on opposite sides near the top. Drill pilot holes and then screw the handles in place.
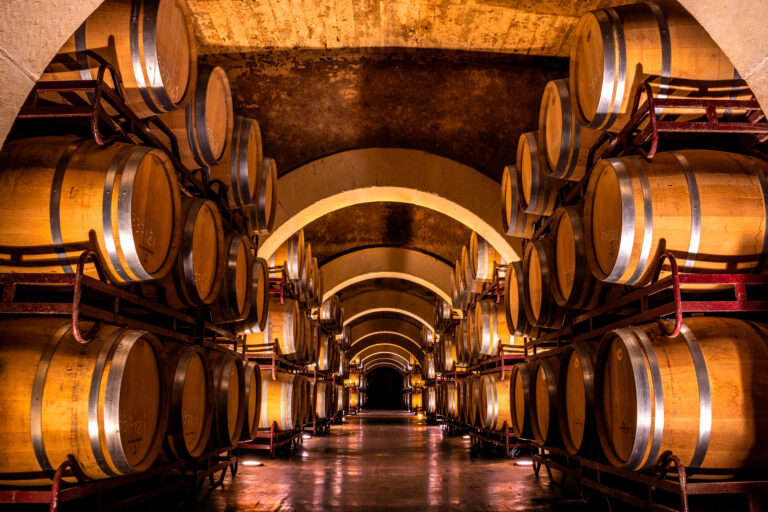
Your barrel is now done and ready to age some spirits! Give it one last wipe down to get rid of any extra sealant. Let it cure for a week before you fill it. Then you can pour in your whiskey and let it sit for at least three years to develop its flavor. With a little maintenance, your custom barrel can last for decades.
Tips for Aging Whiskey at Home
- Start with a good barrel: Choose a barrel that’s previously held bourbon or sherry. The wood will add extra flavors to your whiskey. Oak is the traditional choice.
- Char the inside: Charring the wood adds color and flavor. A medium char, where the wood is visibly burnt but not turned to ash, is good for most whiskeys.
- Use a high-proof spirit: Start with a neutral grain spirit that’s at least 95% alcohol. The whiskey will lose some alcohol as it ages, so it’s good to start strong.
- Sample often: Check on your whiskey regularly to see how the flavor is developing. This also helps prevent over-aging. Use a whiskey thief to take small samples.
- Think about blending: For a more complex flavor, age your whiskey in different barrels – maybe some new oak and some used bourbon casks. Then, blend them together before bottling.
- Be patient: Whiskey takes time to develop a balanced flavor. For the best results, age your whiskey for 3 to 5 years. But start tasting it after a few months to keep track of its progress.
- Bottle when it tastes right: There’s no set time for when your whiskey will be ready. Once it has a flavor you love, bottle it up! The aging process stops once it’s bottled.
Aging whiskey at home is a fun hobby if you’re patient. Follow these tips, and in a few years, you’ll have a homemade whiskey you can be really proud of.
Taking Care of Your Barrel
Taking care of your whiskey barrel is important if you want it to last.
Once you’ve filled and sealed your barrel, check on it regularly. Tap the side – it should sound hollow. If it sounds solid, it might have sprung a leak. You’ll want to fix any leaks right away so you don’t lose any of your precious whiskey!
Every few months, give your barrel a roll. This helps the whiskey interact with all parts of the wood, which helps develop its color and flavor. Just grab a friend and gently tilt and roll the barrel, then put it back upright.
When your whiskey has aged to the flavor you’re looking for, it’s time to bottle it. Carefully drill or tap a small hole in the side of the barrel near the bottom rim. Put a bottle under the hole and open the seal to let the whiskey flow in. Once bottled, you can enjoy your homemade aged whiskey!
To reuse your barrel, rinse it really well with hot water until the water runs clear. Let the barrel air dry completely for at least two weeks. You can use a torch to lightly char the inside again. Now your barrel is ready for a new batch of spirits to age and develop its own unique character.
With a little regular maintenance and care, a good whiskey barrel can last for generations. Keep your barrel in a stable environment, away from extreme heat or cold. If you handle it properly, your barrel will keep producing amazing aged spirits for years to come.
Common Mistakes to Avoid
When making your own whiskey barrel, there are a few common traps to watch out for:
- Cheap wood: The type of wood, usually oak, has a huge impact on the whiskey’s flavor. Don’t skimp here. Make sure you use wood specifically meant for barrel making, like American white oak.
- Rushing the wood prep: The wood needs to be cured and toasted just right to get it ready for whiskey. If it’s not seasoned properly, it can give the whiskey some nasty off-flavors. Do your homework on curing and toasting oak staves.
- Wonky barrel shape: The shape and size of the barrel affect how the whiskey ages. A weirdly shaped barrel won’t let the whiskey age and oxidize evenly. Stick to a classic barrel shape for the best results.
- Poor construction: How you put the barrel together is crucial. If it’s not watertight, the whiskey can evaporate or leak out. Make sure all the staves are tightly sealed, and use high-quality hoops.
- Skipping the char: Charring the inside of the barrel is essential for adding flavor to the whiskey. A light char gives you subtle flavors, while a heavy char adds more robust, smoky notes. Don’t skip this step!
- Forgetting to season: A brand-new barrel needs to be seasoned before you add any whiskey. Fill it with water for a few days so the wood can swell and seal any little leaks. Then empty it, rinse it out, and let it dry completely. Now your barrel is ready for its first batch of whiskey.
If you follow these tips, you’ll be well on your way to crafting a great whiskey barrel and avoiding the most common pitfalls. With the right wood, construction, and prep work, you’ll be aging smooth and flavorful whiskey in no time.
How Do You Make a Whiskey Barrel?
Making your own whiskey barrel at home is easier than you might think. You just need a few basic tools and some patience.
- What you’ll need: Wooden staves, metal hoops, a cork, a drill, and a saw. The staves should be oak (usually American white oak or red oak). The hoops, which hold the staves together, are typically made of galvanized steel or stainless steel. You’ll also need a cork to seal the barrel.
- Cutting the staves: Cut the staves to the right size. They should be slightly tapered – wider at the bottom and narrower at the top. It’s important that the staves fit together snugly, so take your time measuring and cutting.
- Putting it all together: Notch the staves so they fit together, then put the bottom hoop around the bottom to hold them in place. Add the cork, then the top hoop. Hammer the hoops to tighten them and secure the staves.
- Sealing and curing: Seal any gaps in the barrel with waterproof wood glue and let it dry completely. Fill the barrel with water to let the wood expand, then empty it and let it sit for several days. This curing process is what gives whiskey its distinctive flavor and aroma. Your barrel is now ready to age some whiskey!
With some basic tools and a little patience, you’ll be sipping aged whiskey from your own custom barrel before you know it. Letting whiskey mature in a handcrafted barrel makes it even more special. Cheers to your new hobby!
Final Thoughts
So, now you know you can age your own whiskey at home. You’ve got the barrel, you’ve sourced your spirit, and you’ve sealed it all up to rest for several years. Now comes the hard part: waiting! But while you wait, think about how rewarding that first taste will be, knowing you made something so special with your own hands. You’ll have a whole new appreciation for the time and passion that goes into a good aged whiskey. And when the day finally comes to crack open that barrel, get some friends together, pour a dram, and toast to your new skills as a whiskey maker. All that patience will be worth it. Here’s to you and your homemade whiskey! May that first sip be as good as you imagine.