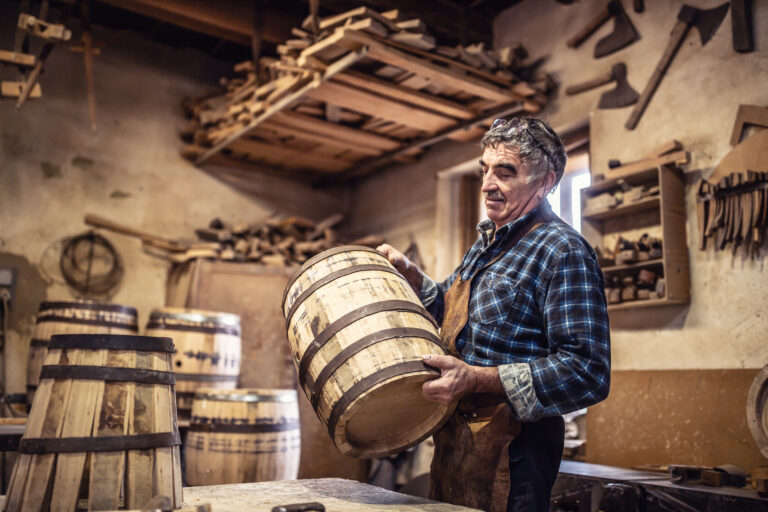
You’ve got that itch, that craving for the rich, intricate character of aged whiskey, and you’re ready to embark on the rewarding journey of crafting your own. The secret ingredient to unlocking truly exceptional whiskey? High-quality oak barrels, the very vessels that nurture and transform raw spirit. But just like a fine chef preps their ingredients, preparing those whiskey barrels properly is paramount to achieving that signature amber hue and the nuanced taste that makes a well-aged dram so coveted. Don’t sweat it; we’ve got your back. Think of this as your trusted companion, guiding you step-by-step through the process of readying your oak barrels to work their magic on your distilled whiskey, turning it into a refined, golden elixir. By the time your whiskey has slumbered in the barrel, you’ll gain a whole new appreciation for the dedication and artistry that goes into creating a premium bourbon or single malt. So, let’s roll up our sleeves and get started!
Selecting the Right Oak Barrel for Whiskey
Choosing the perfect oak barrel is the first crucial step in your quest for aging quality whiskey. It’s like picking the right soil for a prized plant.
American or European Oak?
Think of it this way: American oak barrels tend to whisper sweet notes of vanilla and a hint of coconut into your whiskey, thanks to their inherent wood chemistry. European oak, on the other hand, adds a more subtle touch of spice and a nutty undertone. Interestingly, if you’re aiming for bourbon, American oak isn’t just a suggestion – it’s the law! For other whiskey styles, let your desired flavor profile be your compass.
Toast Level
Imagine toasting a marshmallow – the longer you toast it, the richer and more complex the flavors become. The “toast level” of a whiskey barrel refers to how long the inside was kissed by heat during its making. A lighter touch of toast means more of the wood’s natural tannins and a distinct oak character will influence your whiskey. A deeper toast unlocks richer caramel and warm spice notes. Most seasoned distillers often find a sweet spot with a medium toast, offering a beautiful balance.
Barrel Size
For us home distillers, barrel sizes typically range from a manageable 15 to 30 gallons. Think of it like this: larger whiskey barrels age their contents more patiently due to a smaller surface area relative to the volume of liquid. Smaller barrels, however, lead to a quicker dance between the whiskey and the wood, meaning you’ll get more wood-derived flavors in a shorter timeframe. For your maiden voyage into whiskey aging, a medium-sized barrel in the 15-20 gallon range is a fantastic starting point.
New or Used
A fresh, new oak barrel will impart more pronounced oak flavors into your whiskey, like a blank canvas eagerly sharing its essence. Used barrels, having already held spirits like bourbon, offer a mellower, more integrated flavor profile, adding layers of complexity from their previous life. Many distillers have a soft spot for used ex-bourbon barrels when aging whiskey. You can’t really go wrong with either choice; it all boils down to how much of that woody character you desire in your final whiskey.
With the right oak barrel chosen, you’re well on your way to savoring your own exceptional homemade whiskey before you know it!
Dumping and Rinsing the Barrel
Alright, now let’s get hands-on and prep that oak barrel so it’s the perfect home for your future whiskey.
First things first, give that barrel a good internal shower with hot water to wash away any loose bits and pieces. Fill it up, swish it around like you’re rinsing a giant mug, then empty it. Repeat this a few times until the water runs clear – a sign that the inside is nice and clean.
Next up, we want to make sure it’s a pristine environment for your whiskey. Fill the barrel with a solution of water and a touch of citric acid or sodium metabisulfite, then seal it tight. Let it sit for at least a week, giving it a gentle shake now and then. This sanitizing bath will knock out any unwanted bacteria or wild yeasts that might be lurking in the wood.
After its week-long spa treatment, empty the solution and give the barrel another good rinse with hot water. Now, let it sit open for a day or so, allowing any lingering moisture to evaporate. This little step helps the wood swell naturally, which can seal up any tiny leaks you might not even see.
Voila! Your oak barrel is now prepped, primed, and ready for its first fill of your precious distilled whiskey. Pour it in, seal it up, and let the magic of time and oak begin. With a little patience, you’ll soon have an oak-aged whiskey that’s truly one of a kind.
Following these simple steps ensures your barrel is clean and sanitized, allowing your whiskey to interact beautifully with the wood. Now, kick back, relax, and let the enchanting dance of barrel aging unfold!
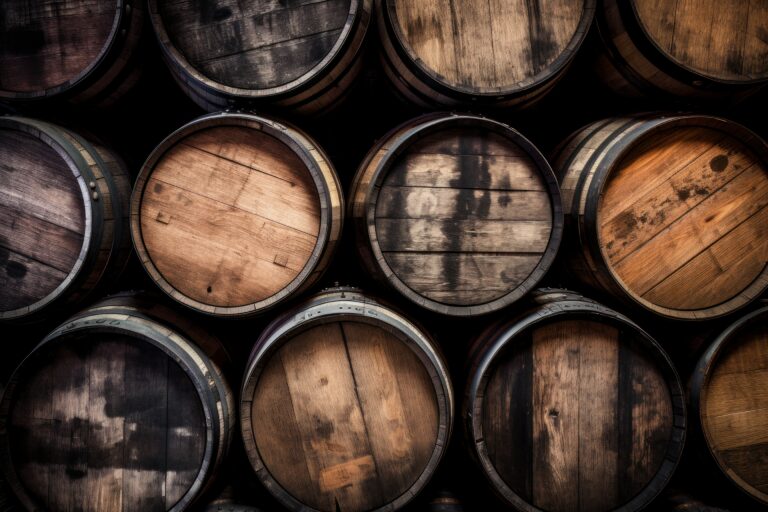
Removing the Lid and Assessing the Inside
Now that your oak barrel has been properly toasted and seasoned, it’s time to peek inside and see what awaits. Gently pry off the lid, taking care not to scratch or damage the barrel. Once open, give the interior a good visual once-over.
Keep an eye out for any cracks, splits, or signs of leaks. Small, fine cracks in the staves (those curved wooden pieces that make up the barrel) are usually normal and won’t cause any trouble during aging. However, larger cracks could lead to precious whiskey escaping, so they’ll need some attention.
Check the barrel hoops (the metal rings on the outside) to make sure they’re snug and secure. Loose hoops can be tightened with a special tool called a hoop driver.
Give the spigot (the tap) a look to ensure it’s properly sealed, preventing any drips when you eventually fill the barrel. If needed, you can reseal it with plumber’s putty, beeswax, or a food-grade silicone sealant.
Also, make sure the barrel bottom and the joints where the staves meet are sealed tight and watertight. If you spot any gaps, reseal them using the same materials.
Take a good sniff inside. A well-seasoned barrel should smell pleasantly of toasted oak, not of anything musty or unpleasant. If you detect any off-putting smells, the barrel might need a bit more time to air out or even re-seasoning.
Grab a flashlight and give the interior a thorough inspection for any unexpected “guests,” like little critters or insects. If you find any, make sure to remove them before you fill and seal the barrel.
Once everything checks out and looks good, you’re all set to fill ‘er up and begin the wonderful process of aging your whiskey! The careful preparation you’ve done will pay off, helping you create a smooth and flavorful aged spirit.
Charring the Interior With Fire
To give your whiskey that signature flavor that oak barrels are famous for, the inside of the barrel needs to be charred. Think of it like caramelizing sugar – charring the wood creates a symphony of complex flavors through caramelization and the Maillard reaction.
Carefully start a small fire right in the center of the barrel and let it burn for about 30 to 45 minutes. The longer it burns, the darker the char will become. For safety, use long matches or a barrel lighter to ignite the fire without getting too close to the flames.
Keep an eye on the fire as it burns. Once the interior is evenly charred to the darkness you desire, carefully extinguish the remaining flames by placing the lid back on the barrel. Let the barrel cool down completely before you handle it, as the char can easily rub off while it’s still hot.
A light char, sometimes referred to as a toast, will impart more subtle oak flavors to your whiskey. A heavier char, on the other hand, will bring out more robust notes of vanilla, rich caramel, and a hint of smokiness. For whiskey, a medium char, often around a #3 or #4 level, is quite common. Ultimately, the level of char is a matter of personal preference, so you might want to experiment with different intensities as you become more experienced.
Charring the barrel is a crucial step that brings it one step closer to being the perfect vessel for your spirits. The charred interior significantly increases the surface area for the whiskey to interact with the wood, allowing it to extract those wonderful oak lactones, tannins, and aromatic compounds. After the barrel has cooled, simply rinse out any loose ash, and it will be prepped and ready for filling.
Toasting the Barrel to Desired Level
The level of toast you achieve in your oak barrel will have a significant influence on the final flavor profile of your whiskey. Think of it like gently roasting coffee beans – different roast levels unlock different aromas and tastes. More toasted barrels tend to impart delightful notes of vanilla, sweet caramel, and even a hint of cocoa. If you opt for a lighter toast, you’ll generally get more pronounced oaky and woody flavors in your whiskey.
To toast your barrel, carefully place it over an open flame, like a gas burner. Slowly rotate the barrel, allowing the interior to be gently kissed by the heat until it reaches your desired toast level. You can periodically check the progress by briefly opening one end of the barrel. A light toast will result in a light brown color inside, a medium toast will be a medium brown, and a heavy toast will be a darker brown.
Please exercise extreme caution when toasting your barrel, as the alcohol fumes that might still be present in the wood can be flammable if overheated. It’s always a good idea to have a fire extinguisher nearby, and never leave the barrel unattended while toasting. Remember that the barrel will be extremely hot after toasting, so allow at least 24 hours for it to cool down completely before you even think about filling it with your precious distilled spirits.
The level of toast is truly a matter of your personal taste, so don’t be afraid to experiment with different levels as you refine your whiskey-making skills. Generally, a medium toast is a fantastic starting point for both bourbon and other whiskey styles. But whether you’re after a robust, smoky character or a lighter, crisper oak flavor, toasting your barrel to your specific preferences is a key step in crafting a truly artisanal whiskey.
Treating the Barrel With Water or Wine
Treating your oak barrel with either water or wine before introducing your whiskey is like preparing the canvas before an artist begins to paint – it helps the wood get ready for its important role.
Water
Simply fill the barrel completely with water and seal it tightly. The water will work its way into the wood, causing it to expand and naturally close up any tiny pores or hairline cracks. Let it sit for several days, allowing the wood to fully saturate. After a few days, empty the water and give the barrel a thorough rinse with fresh water. Now, your barrel is nicely hydrated and ready to embrace your whiskey.
Wine
Some distillers, particularly those aiming for unique flavor profiles, choose to treat their barrels with wine, often a robust red like Cabernet Sauvignon or Malbec. Fill the barrel with the wine, seal it, and let it rest for several weeks. The wine will gently infuse the wood with subtle flavor compounds that will eventually transfer to your whiskey, adding an extra layer of complexity. After the soaking period, empty the wine, rinse the barrel thoroughly, and allow it to drain completely. Your barrel now has a flavorful head start in developing its character.
Whether you opt for water or wine, this treatment process helps to mellow the wood and prepares it to cradle your precious whiskey. The liquid encourages the wood staves to swell, which tightens the barrel and seals up any potential gaps. It also aids in removing any undesirable compounds that might be present in the wood. The final rinse with fresh water not only empties the barrel but also washes away any excess tannins or other chemicals that could negatively impact your whiskey.
Your patience during this stage will be rewarded when you finally fill your treated barrels with whiskey. The wood has already begun its interaction with liquid, allowing the whiskey to get straight to work extracting those delicious vanilla, caramel, and oak flavors. While treating your barrels might add a few extra steps to the process, it’s a worthwhile investment that can significantly contribute to a finer, more nuanced aged spirit.
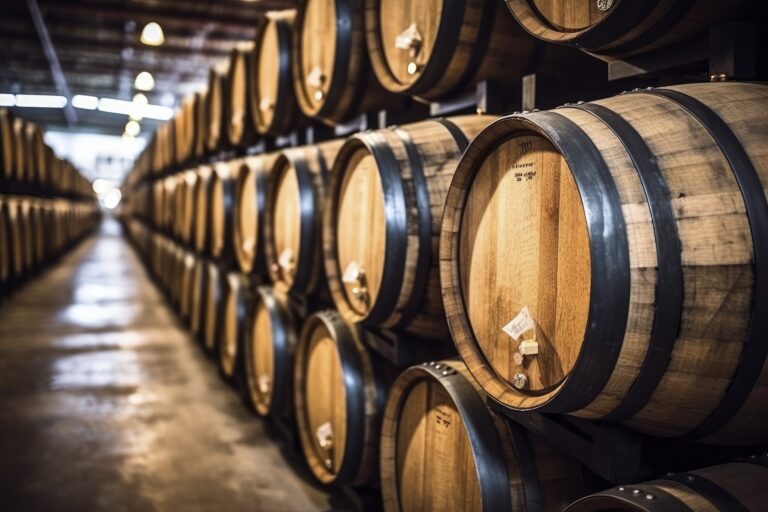
Monitoring and Maintaining Proper Humidity
Keeping a close eye on the humidity levels surrounding your aging whiskey barrels is absolutely crucial for the whiskey’s proper development. Think of it as creating the ideal climate for a delicate ecosystem. The sweet spot for relative humidity is typically between 65% and 85%.
Use a Hygrometer
Invest in a good quality hygrometer – a device that measures humidity – to keep track of the moisture levels in your aging room or chamber. Place several hygrometers throughout the space, at different heights where your barrels are stored, to ensure you’re getting consistent readings across the entire area. It’s also a good practice to calibrate your hygrometers regularly to ensure they’re providing accurate measurements.
Add or Remove Humidity
If you notice the humidity dipping below 65% or climbing above 85%, you’ll need to take action to bring it back to the optimal range. To increase humidity, you can place bowls of water in the room, gently mist the barrels with a spray bottle, or use a humidifier. To decrease humidity, consider running an air conditioner or dehumidifier, improving ventilation in the space, or using moisture-absorbing products like DampRid.
Rotate Barrels
As your whiskey ages gracefully, a small amount of the liquid will naturally evaporate – this is often referred to as the “angel’s share.” To ensure all your barrels experience the same temperature and humidity conditions over time, rotate them from top to bottom levels every 6 to 12 months. This also allows the whiskey inside to interact with different areas of the barrel, potentially leading to a more complex and nuanced flavor profile.
Monitor for Leaks
Regularly inspect your barrels for any signs of leaks or drips. Darkened spots on the barrel itself or puddles on the floor are telltale signs. Leaks can allow too much oxygen to come into contact with the whiskey, which can negatively impact its aroma and flavor. Minor leaks can often be repaired using a combination of wood glue and barrel wax. However, for significant leaks, you might need to carefully transfer the whiskey to a new barrel to prevent spoilage.
By diligently maintaining the proper humidity and temperature levels, regularly rotating your barrels, and promptly addressing any leaks, you’ll be well on your way to ensuring your whiskey develops the desired aroma, color, and flavor as it matures. Careful monitoring and swift adjustments are key ingredients in crafting a truly exceptional product.
Deciding When the Barrel Is Ready for Whiskey
Once your oak barrel has been lovingly seasoned and is prepped for its precious cargo, there are a few telltale signs to look for that will assure you it’s ready to impart its magic on your whiskey.
First, give it a good sniff. The inside of the barrel should smell pleasantly woody and distinctly oak-y, not at all musty or damp. You’re hoping to detect those inviting notes of vanilla, sweet caramel, and warm spice that come from the oak. If you get a whiff of anything musty, it’s a sign the barrel needs more time to air out and breathe.
Next, give the barrel a gentle feel. The staves and hoops should feel solid and secure, with no noticeable cracks or looseness. Give the sides and hoops a few firm taps. If anything sounds or feels wobbly, it’s best to let the barrel rest a little longer, allowing any small cracks to naturally seal up.
Here’s a little trick: swirl a small amount of water inside the barrel and see if it beads up and rolls off the interior surface. This indicates that the wood has been properly seasoned and the pores are nicely closed, meaning the barrel is ready to hold liquid without any unwanted leaks.
Once you do fill the barrel with your distilled white whiskey, keep a close eye on it for the first day or two. If you spot any drips or leaks, it’s a sign that something isn’t quite right. In this case, you’ll need to empty the barrel, re-season it, and unfortunately, start the process over. It might feel disappointing in the moment, but it’s a crucial step towards achieving a truly exceptional aged spirit.
When all the signs point to a perfectly seasoned barrel, you can finally fill it with your distilled white whiskey. And then, the real waiting game begins. But trust us, in a few short years, after the patient dance between time and oak, you’ll be rewarded with a fine aged whiskey that’s truly worth savoring. The time will pass more quickly than you think!
Frequently Asked Questions on Prepping Oak Barrels for Whiskey
Do I need to season or toast the oak barrels?
Absolutely! Think of it as waking up the oak. Seasoning and toasting oak barrels are essential steps. Oak barrels are toasted to gently caramelize the natural wood sugars, which in turn imparts wonderful flavors to your whiskey. Typically, barrels used for whiskey aging are medium or medium plus toasted, striking a nice balance of flavor.
How long does it take to season oak barrels?
Seasoning oak barrels is a patient process, usually taking anywhere from 3 to 6 months. During this time, the barrels are filled with water and left to sit, allowing the water to gradually absorb the desirable oak flavors. The water is then drained and discarded, and this process is repeated until the water develops a pleasant oak aroma and taste. This indicates the barrel is starting to impart its character.
Should I char the inside of the oak barrels?
Charring the inside of oak barrels is an optional step, but highly recommended for whiskey making. Think of the char layer as a natural filter and flavor enhancer. The char creates a layer of carbon inside the barrel that helps to filter out any impurities from the whiskey as it ages. The level of char you choose will influence how much oak flavor is intensified in your final spirit. A lighter char will contribute more subtle oak notes, while a heavier char will impart stronger oak flavors, along with those delicious hints of vanilla and caramel.
Do I need to wax seal the oak barrels?
Yes, wax sealing the oak barrels is an important step in preventing excessive oxygen exposure and evaporation during the aging process. The wax creates an airtight seal around the barrel, allowing the whiskey to mature slowly and gracefully. As the whiskey ages, it naturally expands and contracts with temperature fluctuations. The flexible wax seal accommodates these changes, ensuring the barrel remains properly sealed throughout the aging period.
How often should I check on the aging whiskey?
It’s a good practice to check on your aging whiskey at least once every 3 to 6 months. During these check-ins, ensure that the barrels are still securely sealed and take the opportunity to taste and smell samples from a few different barrels to monitor the flavor development. Regularly checking allows you to get a feel for when your whiskey has reached its peak maturity and is ready for bottling, ensuring you capture it at its finest.
Final Thoughts
So there you have it – your comprehensive guide to prepping oak barrels for the rewarding journey of aging whiskey. While this process requires a bit of patience and attention to detail, the final results – a smooth, complex, and uniquely crafted whiskey – are truly worth the effort. As the oak barrel slowly imparts its beautiful amber color and signature oaky flavors to your spirit, you’ll have the satisfaction of knowing you played a vital role in creating something truly special. And each time you pour a glass of your own aged whiskey, take a moment to appreciate the humble barrel that made it all possible. Here’s to you, and to the little barrel working its magic! May the whiskey you age be forever bold and bright.